It’s April and Easter will be here before we know it (April 12th). This weekend, I’ll be coloring Easter eggs with my sons over their great-Aunt’s home. I haven’t had the chance to get either of them an Easter basket since they’ve been born, because she gets them. That’s totally fine with me though!
Anyway, this year we have some great new egg decorating kits from Paas to try out – Color Squirt, Flower Power, Sand Blast and Chalked Up. What’s fun is that I also have a set of these four kits to give to one lucky Mom in the City reader!
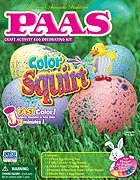

“-Color Squirt –PAAS Color Squirt kit provides an easy way to give eggs a unique tie-dye look. Simply fill spray pumps with the provided paints and let the creative juices flow.
-Flower Power – Easter eggs will be in full bloom this spring with the PAAS 3-in-1 Flower Power kit. Embellish with multi-colored flower sequins and stickers, and display decorated eggs in a flowerpot for a festive look.
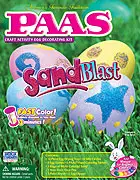
-Sand Blast – Three bags of multi-colored sand bring texture and color to plain or dyed eggs.
And
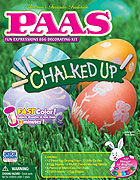
-Chalked Up – Change up the fun with chalk. This easy-to-use kit lets decorators design and change their minds. For a clean slate, simply wipe off the chalk with the felt eraser.”
After decorating the eggs, I have a couple of egg storage craft ideas from the April 2009 issue of FamilyFun magazine . The magazine was kind enough to let me share the craft instructions for their Tiered Egg Stand and the Nesting Instinct projects with you below…
Tiered Egg Stand
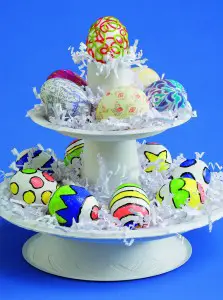
To create a towering impression at your family’s Easter feast, make this stand in colors that match your table setting.
CRAFT MATERIALS:
-Paper
-Cardboard tube
-Tacky glue
-Disposable bowl, dinner plate, cup, and dessert plate
-Shredder or scissors
Time needed: Under 1 Hour
1. Wrap a trimmed piece of paper around a 2 1/2-inch-tall section of cardboard tube and secure it with tacky glue.
2. Gather a disposable bowl, dinner plate, cup, dessert plate, and the tube and glue them together as shown.
3. Shred paper with a shredder or scissors, arrange it on the tiers, and set your decorated eggs in place.
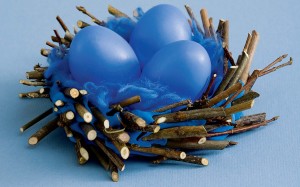
Nesting Instinct
Inspired by the home-building boom that keeps our feathered friends busy each spring, this simple craft gets everybody outdoors to gather materials and enjoy the season. A modeling clay base makes the whole thing a breeze to put together. When it’s done, the nest is a sweet home for your family’s egg creations.
CRAFT MATERIALS:
-Air-drying modeling clay (we recommend Crayola Model Magic for its pliability and ease of use)
-Garden clippers
-Twigs and yarn, straw, or other nest-building materials
Time needed: About 1 Hour
1. Shape the clay into a shallow bowl with thick sides. (Our nest measures about 5 inches across and 1 3/4 inches tall.)
2. Using the clippers, cut twigs on the diagonal, creating pointed ends (a parent’s job). Insert the twigs at an angle into the nest’s outer wall as shown, working your way around the nest’s circumference.
3. Line the nest with the yarn or straw and press other nest-building materials into the clay where desired. Let it dry overnight.
To enter this special one week giveaway, please tell me one of your favorite spring or Easter traditions in the “Comments” section below by Tuesday, April 7th.